
How to Install and Configure OpenWRT on the BananaPi BPI-R3: Complete Guide
Why Choose the BananaPi BPI-R3 for Your Home Network?
When searching for the perfect primary router for a modern home network, the BananaPi BPI-R3 stands out as an excellent option that meets these requirements:
- Supports the latest stable OpenWRT version (no snapshot)
- Features WiFi 6 (ax) capabilities with a modern stack
- Includes at least 4 LAN ports
- Delivers good performance with multi-core CPU
- Remains relatively affordable compared to alternatives
- Is readily available for purchase
The only drawback? Installation isn't straightforward. This comprehensive guide walks you through installing OpenWRT on the BananaPi BPI-R3, making this powerful router accessible to more users.
Required Hardware for Installation: Serial Adapter
Before starting your OpenWRT installation, you'll need:
- USB to Serial adapter (CP2104, FTDI, or CH340G chipset)
- Three jumper/dupont cables/wires for making the necessary connections
- [Optional] Windows driver for your specific adapter chipset
Most users don't have a USB to Serial adapter readily available. Fortunately, these adapters are affordable and easily found online by searching for "CP2104 USB to TTL Serial" or similar terms.
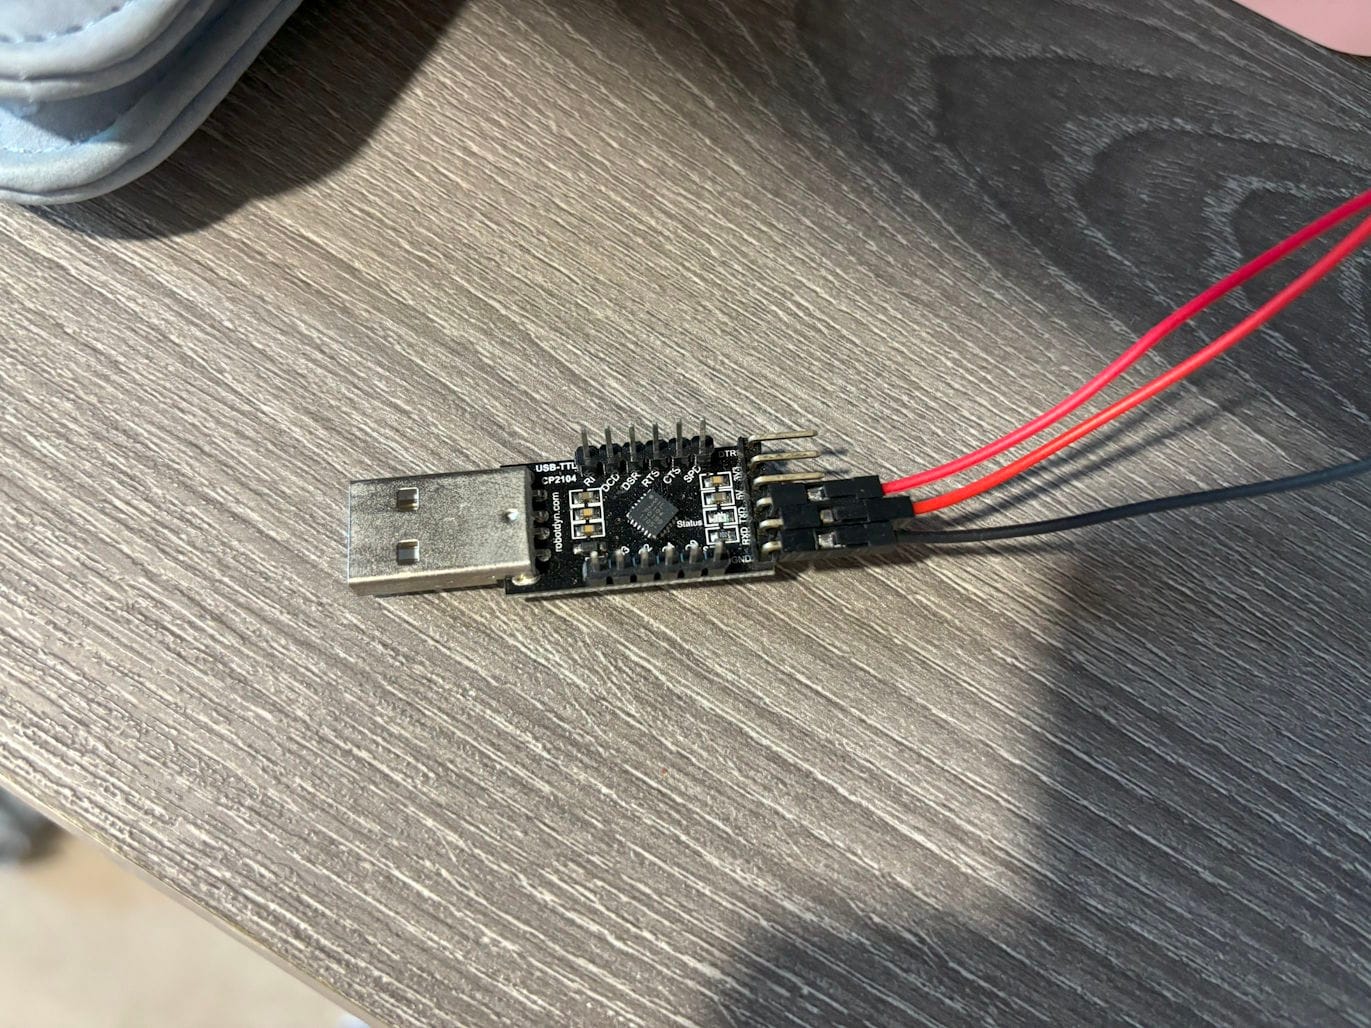
Setting Up Your USB to Serial Adapter
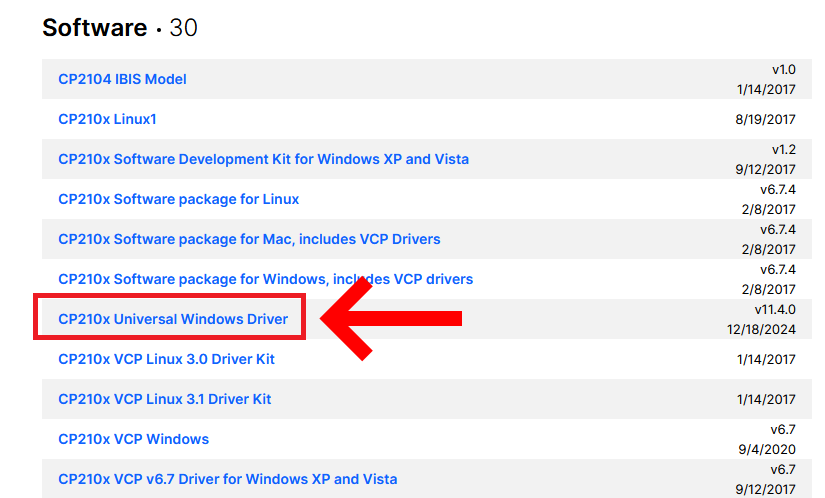
- Install the appropriate driver for your adapter:
Some serial adapters works out of the box with existing drivers; but not all.
Silicon Labs' CP2104 is a well supported chip to do this, but you will need to download the Windows driver for it on their webpage.
- Verify successful installation by checking Device Manager for a new COM port.
This confirms your computer recognizes the adapter correctly.

- Make the physical connections between the adapter and BPI-R3:
- Connect GND (ground) pins together
- Cross-connect TX/RX pins: adapter's TX → R3's RX, adapter's RX → R3's TX
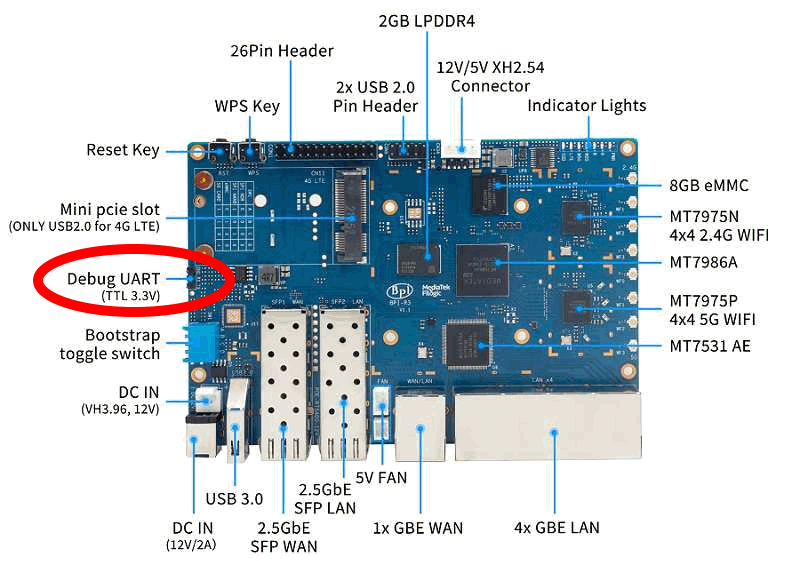
- Locate the "Debug UART" port on the left side of the BPI-R3 board
Once these connections are properly established, you're ready to proceed with the OpenWRT installation process on your BananaPi BPI-R3.
OpenWRT Installation Process
Installing from the SD Card
In order to install OpenWRT on the R3, we will first copy the firmware on the SD Card, then install from the SD to the NAND, then finally install on eMMC. Why we can't just simply install directly on eMMC? I do not know. You will see that overall the operation is very quick.
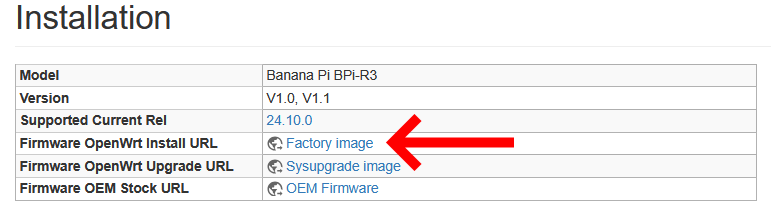
First of all, you need to download the image from OpenWRT's page dedicated to the R3. You will be presented with different options, make sure you download the "Factory Image"
Now, this image needs to be written to a microSD card. There are many way to do this, but on Windows a very simple way to do so is with BalenaEtcher.
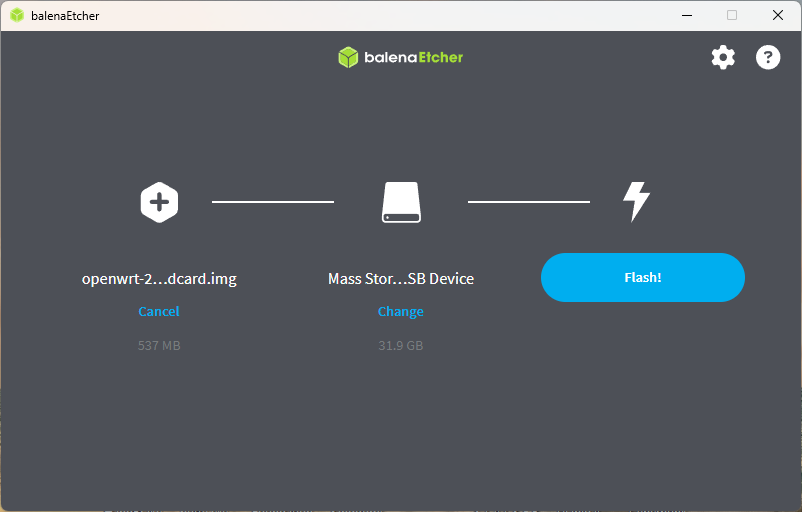
With BalanaEtcher you just need to select the file, here openwrt-24.10.0-mediatek-filogic-bananapi_bpi-r3-sdcard.img.gz, the target, and click on flash. No need to delve into GPT partitions, formatting options, file systems... It'll just do everything properly for you.
Once this is done, pop in the SD card into the R3.
Pre-installation process
You should now be in a stage where:
- The SD card is in the R3
- The USB to Serial adapter is plugged into the R3 and a PC
Now, before you power on, you should do two things: make sure the jumper switches are correct and open the serial port.
Jumper Switches
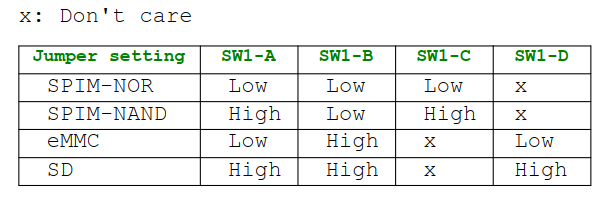
On the board sits 4 switches in a blue box. These control which device the board should attempt to boot from.
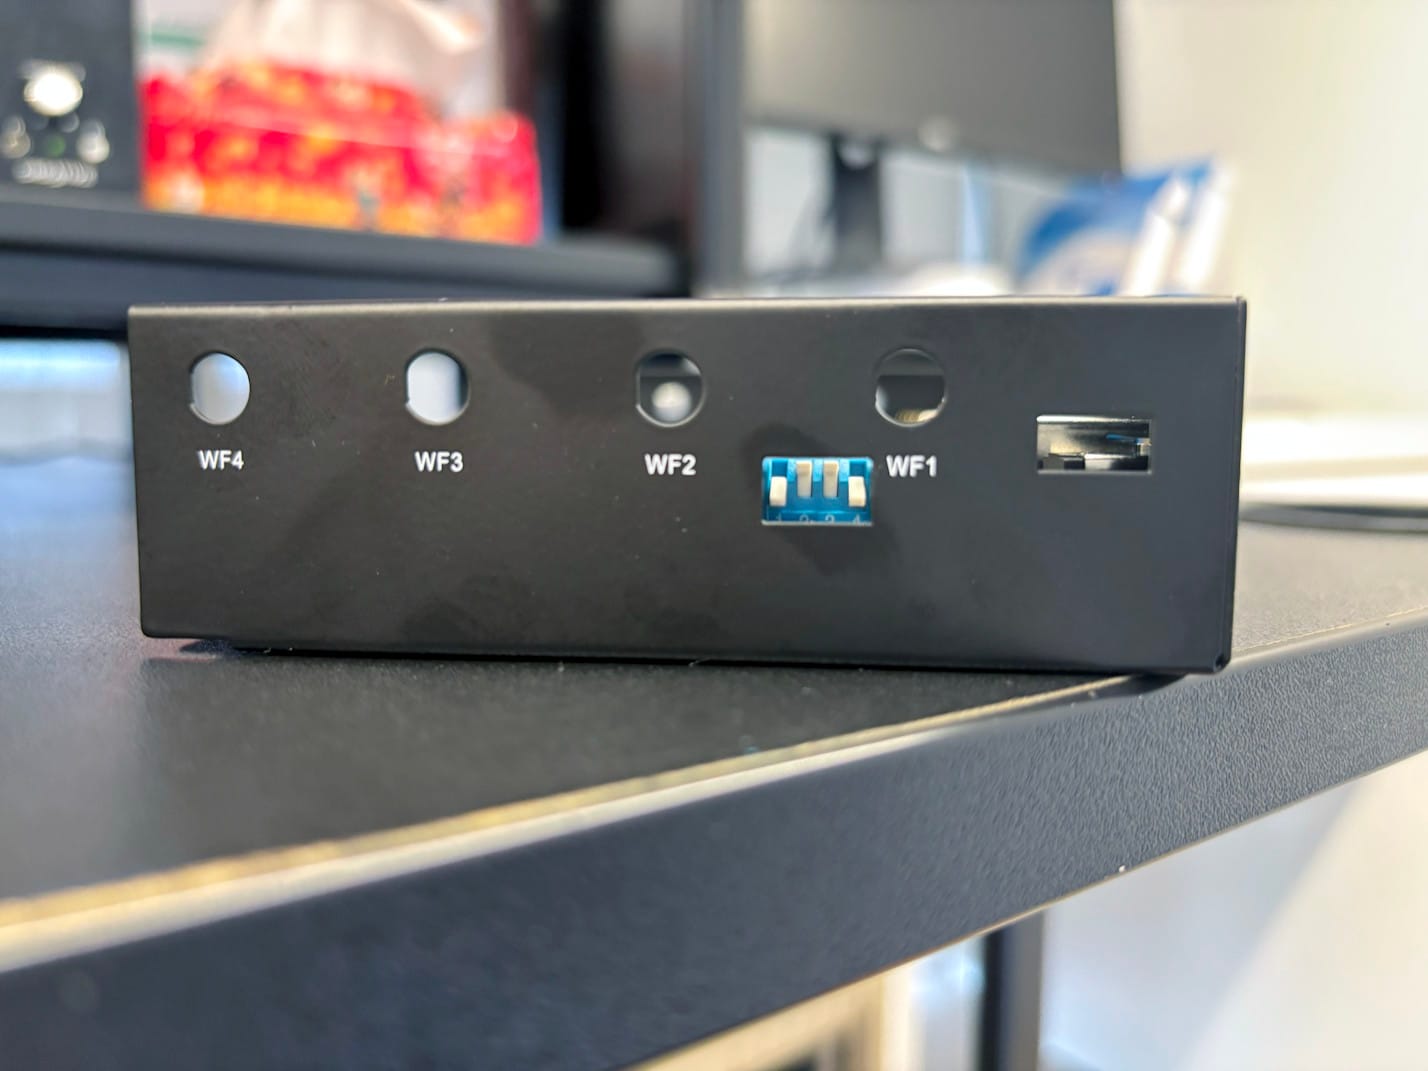
According to the documentation, booting from SD needs to be HIGH HIGH X HIGH so you can set all the jumpers in high position, which should be their default out of the box.
Opening the Serial Port
For this you will need a software able to communicate with the terminal and the most known and widely used for this is PuTTy. Chances are, you already have a PuTTy installed, if not, it is never too late.
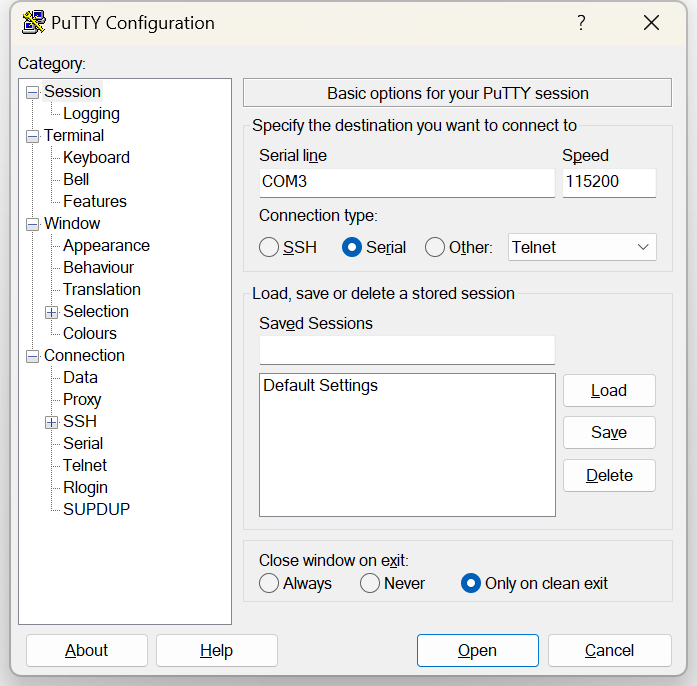
After installing Putty, choose:
- Connection Type: Serial
- Serial Line: your serial port created by your USB to Serial converter, in my case COM3
- Speed: 115200
115200 is the default baud rate at which the BPI R3 will talk over serial. Once this is done, click on Open and power on your device.
First boot and installation
Upon starting up, a boot menu appears and will by default select the first boot option which is to boot to a shell. If you see the screen below, it means you were not fast enough to act.
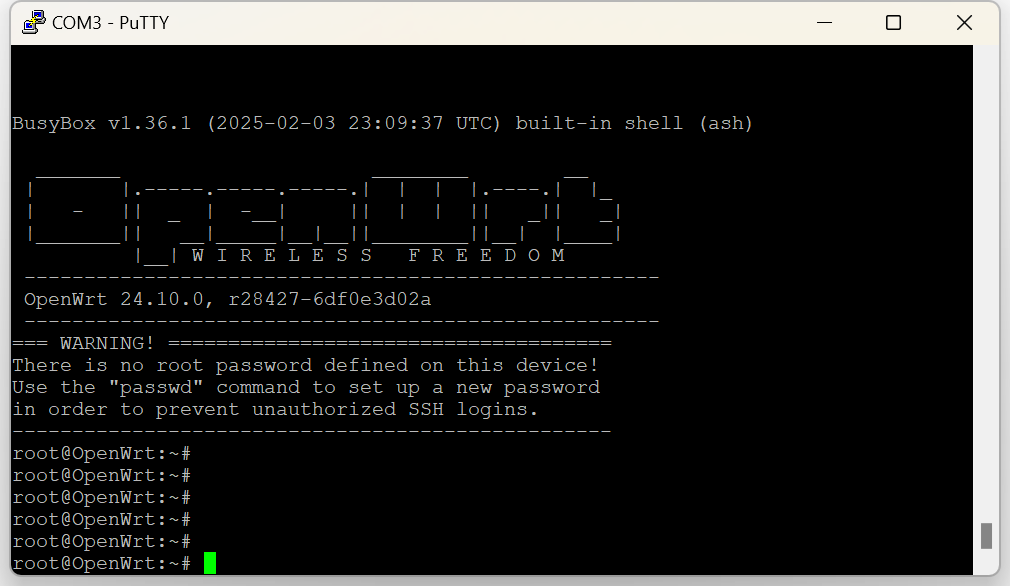
In this case, you can simply reboot the device by using the command:
reboot
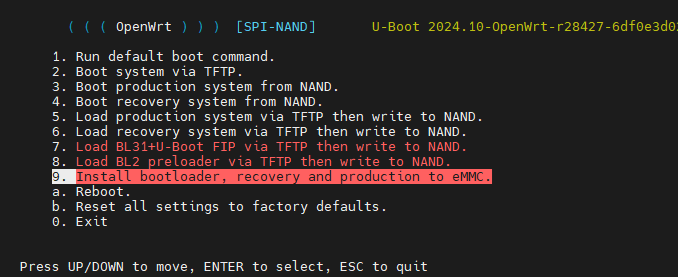
The second time, you should see a menu appear, that you can navigate with arrow keys. Select "Install bootloader, recovery and production to NAND"
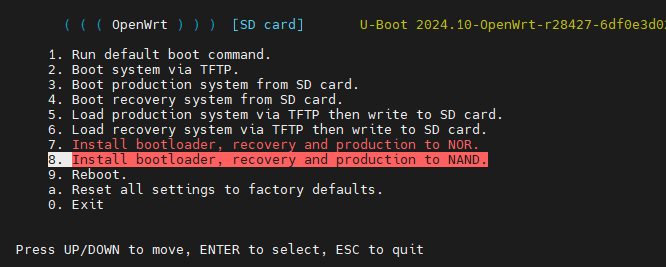
Once everything is done, power off the device.
Now put the dip switches in the following position: HIGH LOW HIGH LOW.
This will enable booting from NAND instead of booting from SD card. The SD card has now served its purpose and you can remove it from the R3. Power on the device again.
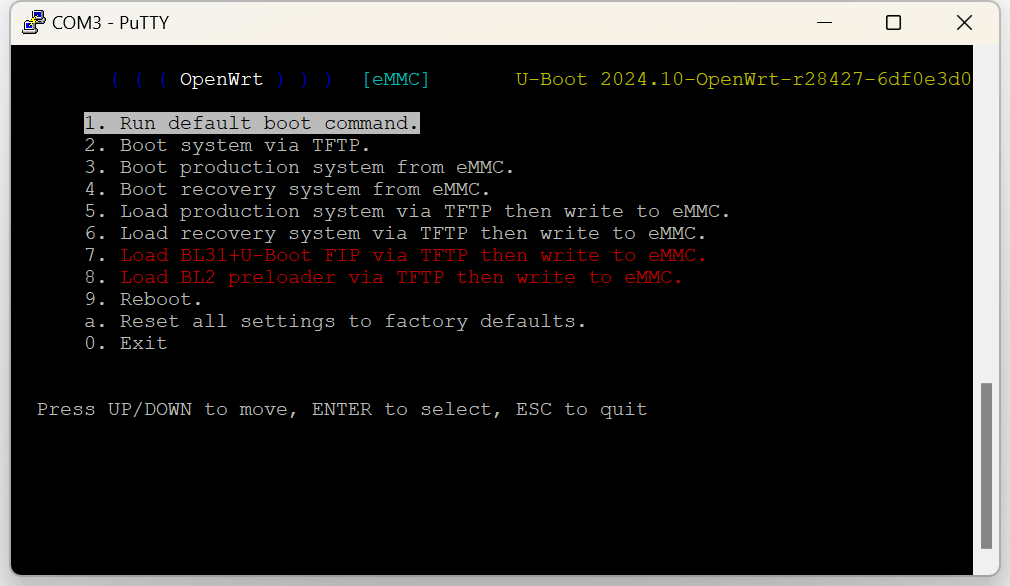
The boot menu will appear once more, but this time you will be offered the option to install on eMMC:
Once this is done, power off the device again, and put the dip switches in their final position: LOW HIGH HIGH LOW.
Finally, on the next boot you should be greeted by this boot menu:
Initial Setup: basic security first
You've probably done the hardest but before we carry on, you should add a password to your root user. For this simply type:
passwd
If you plan on exposing SSH to the internet, this would not be good enough as it would be easy to bruteforce password. For this, you should look into key authentication and disabling root login which is beyond the scope of these pages.
In the meantime, you should restrict ssh access to lan. For this, edit the ssh daemon config file. Note that OpenWRT does not use OpenSSH, but rather Dropbear; which is preferred for embedded linux due to its smaller footprint.
vi /etc/config/dropbear
In here, simply change option Interface to "lan"
config dropbear
        option PasswordAuth 'on'
        option RootPasswordAuth 'on'
        option Port '22'
        option Interface 'lan'
Reload dropbear by using:
service dropbear reload
Setting up the web interface (Luci)
From now on, you can log in to your router in SSH by connecting another machine on any LAN port; or you can carry on with the serial since you're already plugged in.
As this point, the router is now fully functional; and the default network setup is typical of any router out of the box. The router sits by default at 192.168.1.1, it provides DHCP to LAN users and there's a default firewall rule to block inbound connection via the WAN port. For most users, there is no need to mess with these settings.
You can also now finally plug your internet router to the WAN port of the R3; and install luci:
opkg update
opkg install luci
Once this is done, you should be able to give up the UART connectivity and you can now access luci's web interface by typing in your browser: http://192.168.1.1
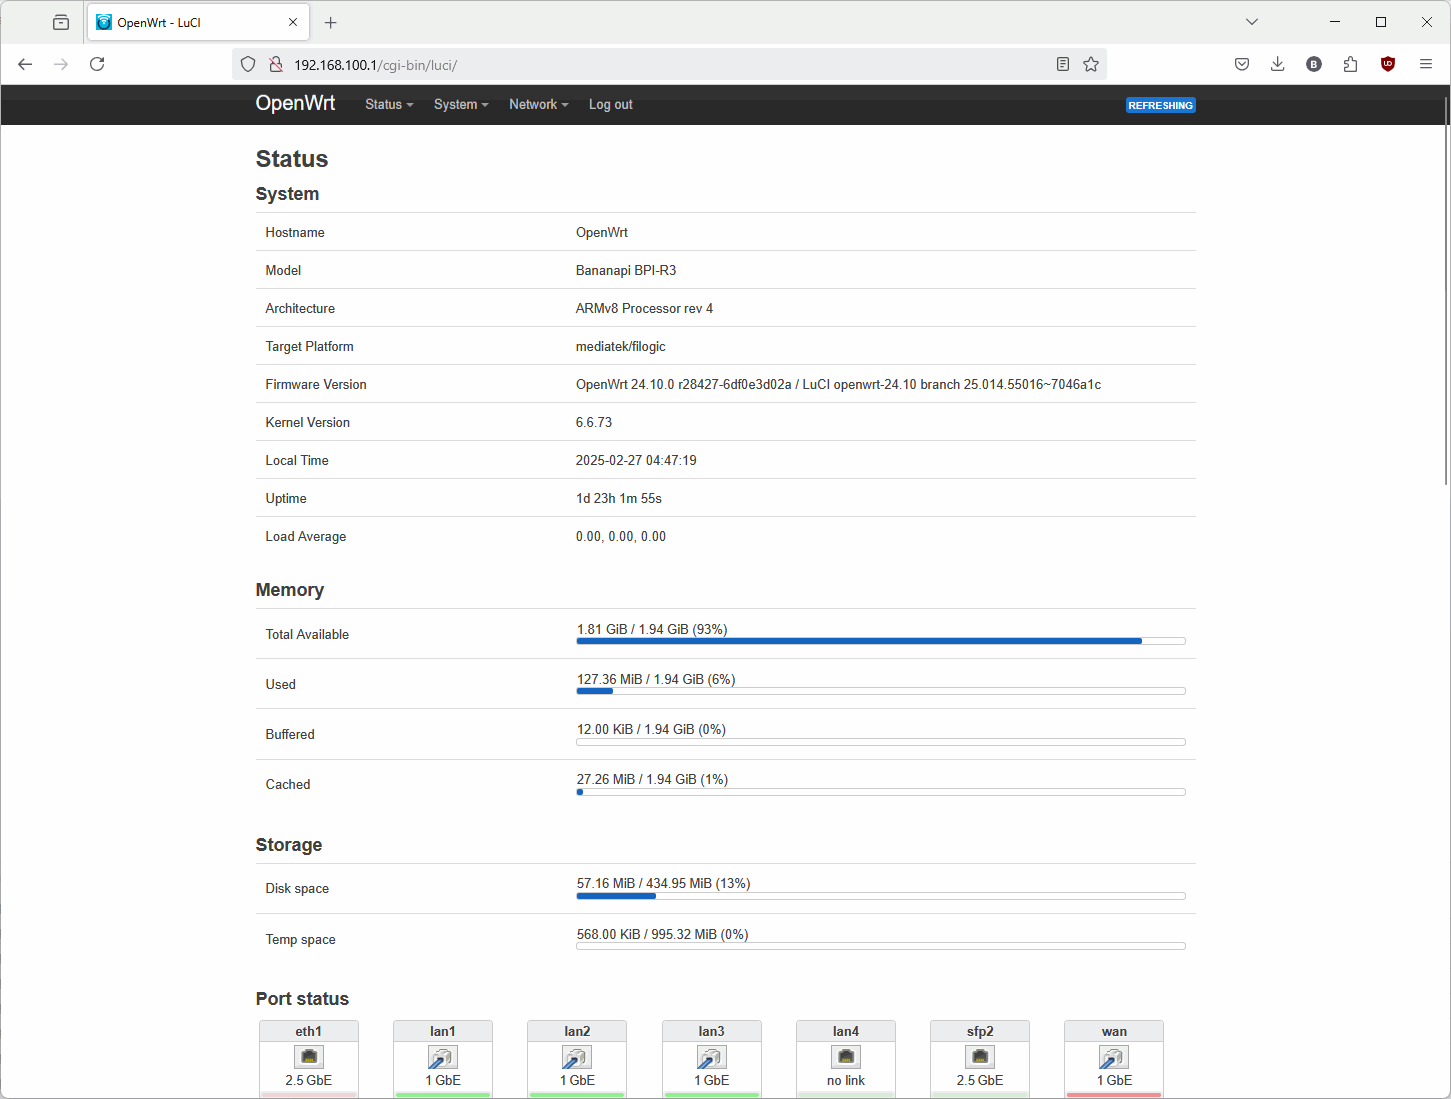
And this is it! You now have a fully functional BPI R3 running OpenWRT.